Originally Published on October 1, 2018. Last Updated on March 19, 2020.
With the extreme heat of summer coming to an end take advantage of the cooler weather to get your kids outside and invested in the great outdoors. One terrific way to spruce up your porch, patio, or other outdoor space is to complete a fun and simple DIY project that will instill a sense of pride in your children. Adding value to your yard, deck, or outdoor alcove will give your children a reason to venture outside and abandon the screens more often. Here are some of our favorite outdoor DIY projects that you can tackle as a family!
Rock Painting
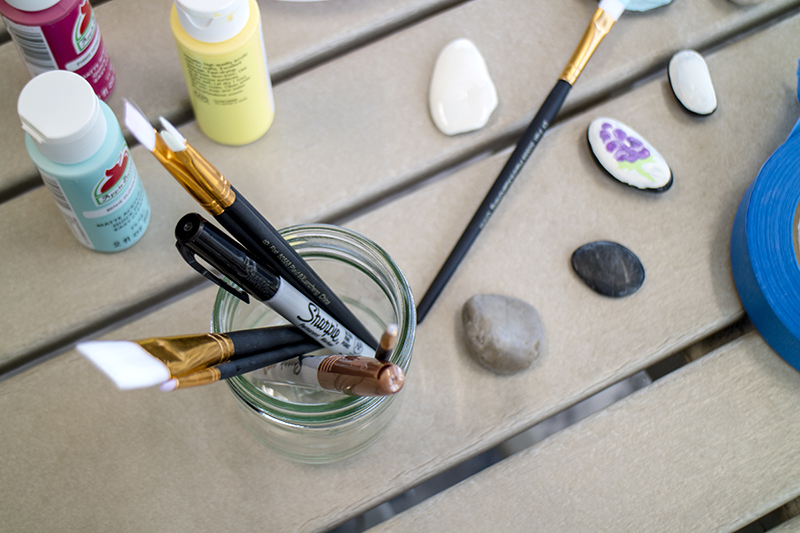
You’ll need:
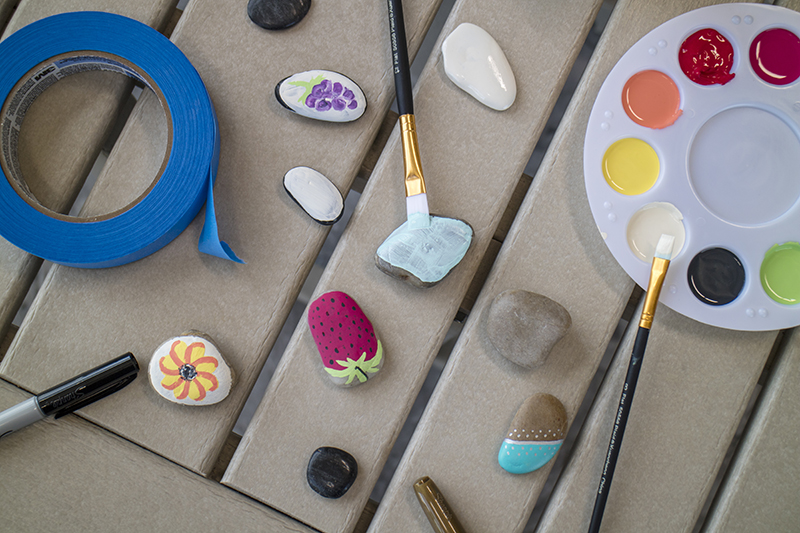
- Smooth rocks
- Sandpaper (optional)
- Painter’s tape
- Outdoor-friendly paint
- Paint brushes
- Fine-point markers
- Spar urethane sealer
Instructions
Step 1: Find the rocks with which you’ll decorate your garden, patio, or entryway. Stones found along rivers and on the beach are naturally smoothed by erosion, so go on a family stroll to choose the rocks you’ll be using. Alternatively, just visit your local craft store and choose the perfect rocks for you! If some of your rocks have coarse sections that won’t be easy to paint you can file them down with coarse sandpaper. If you’d rather skip this process just select rocks that are ready to go!
Step 2: Rocks found outdoors should be washed with warm water and soap to remove debris. Pat dry and wait until there is no moisture left to begin painting.
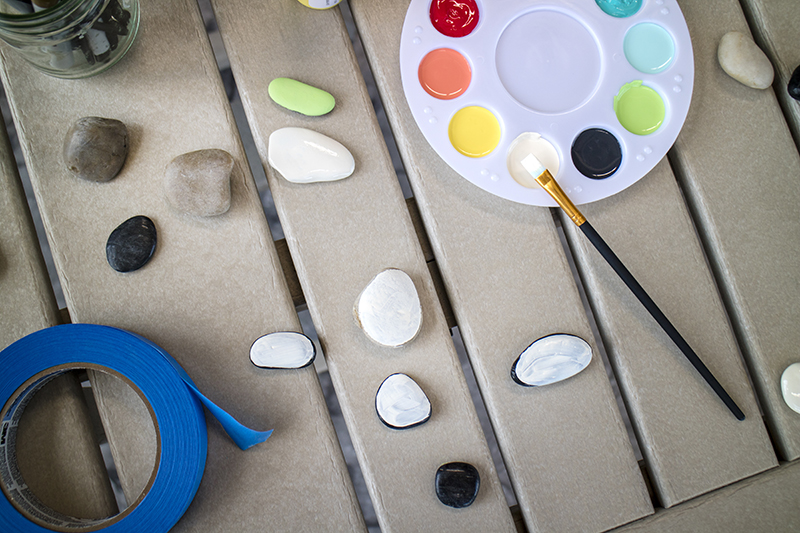
Step 3: Now you’re ready to paint! Some acrylic and tempera paints work well for indoor projects, but take care to purchase outdoor paint so your kids’ rock creations will last for years. Paint in thin layers and allow each layer to fully dry before moving on to others.
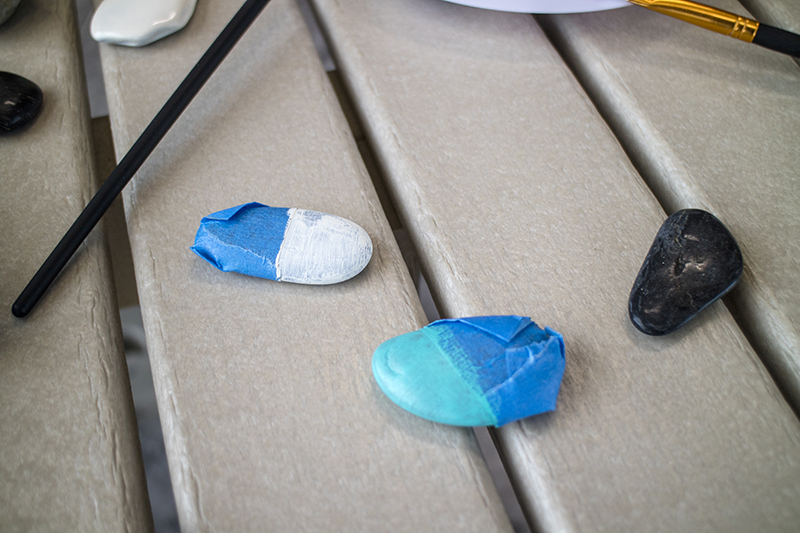
Step 4: You can use painter’s tape to create clean edges, smooth lines, and geometric shapes. Carter Sams, a lifestyle and art vlogger, shows how she makes beautiful rock art with painter’s tape in this video.

Step 5: Once your base layers are completed your children can draw faces, polka dots, flowers, and other fun shapes using fine-point markers. This makes the creative process hassle-free, especially on smaller rocks.
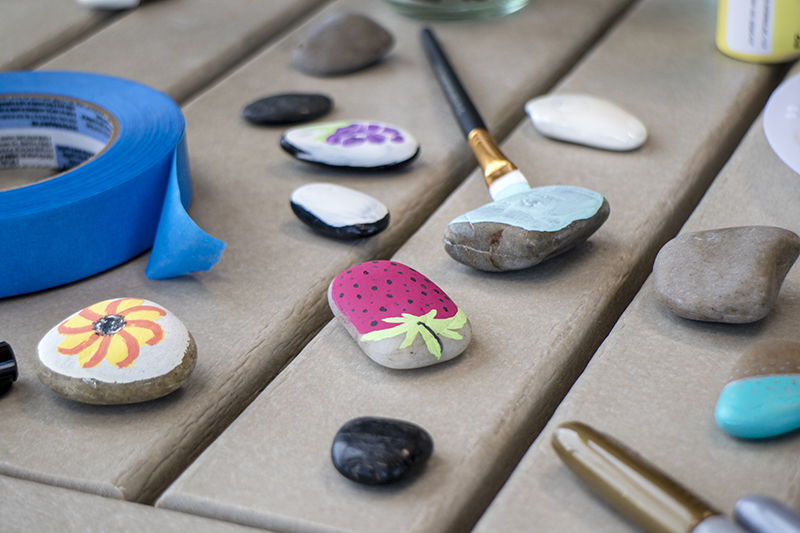
Step 6: Once your rock art dries it’s time to seal it! Use a spar urethane sealer and seal the rocks outside using a clear brush. Depending on the age of your children you may want to take care of this yourself, or at least supervise.
For more details and helpful photos read the rock painting blog at FeltMagnet.
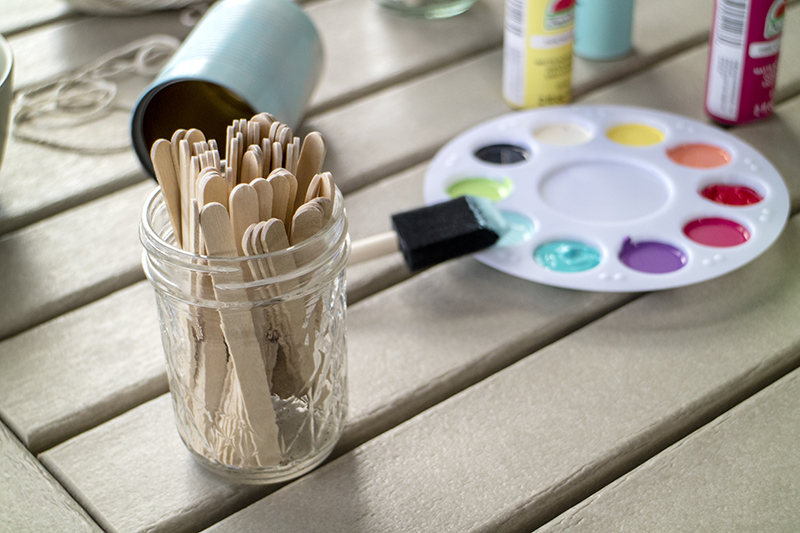
Tin Can Bird Feeder
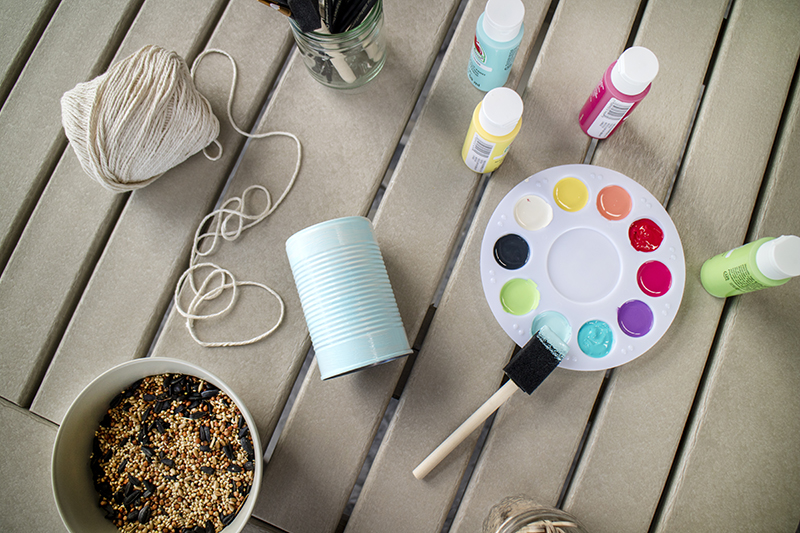
You’ll need:
- Paper towels
- Scissors
- Tin can
- Paint
- Paint brushes
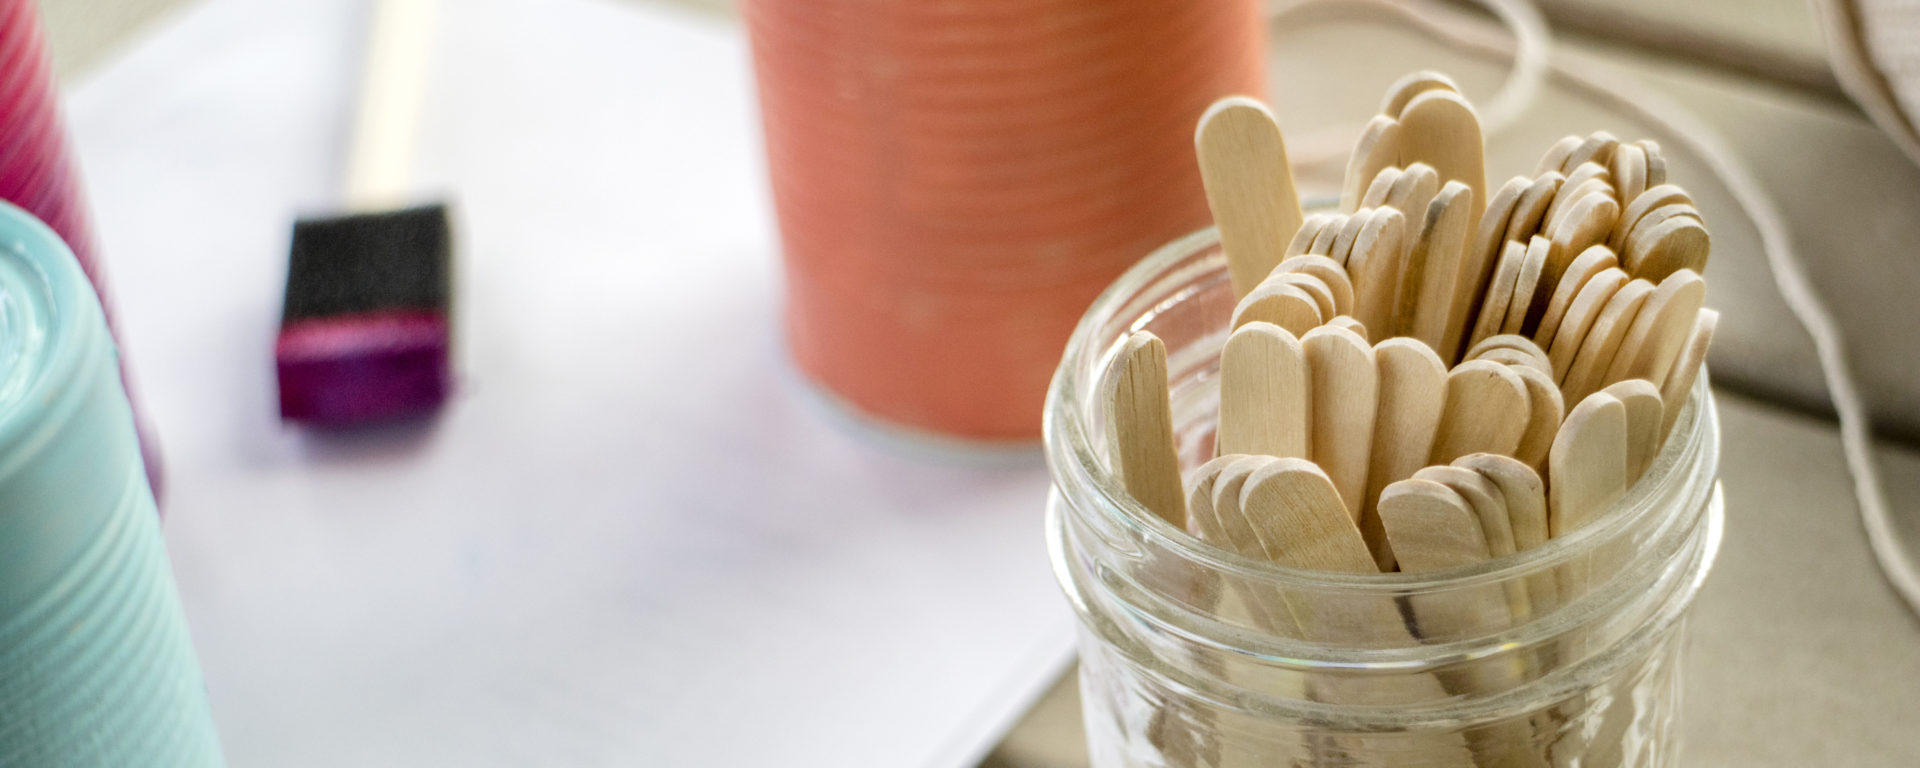
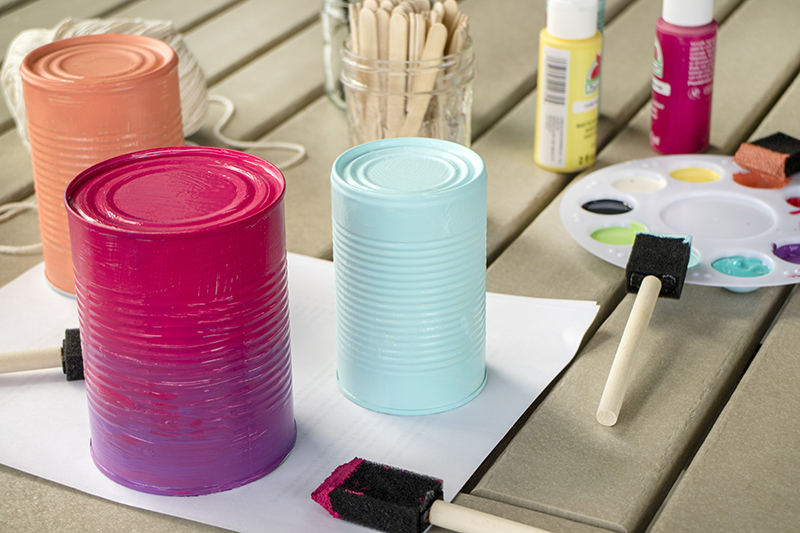
- Popsicle sticks
- Glue
- Bird seed
- Awl
- String
Instructions
Step 1: Set out paper towels (or old newspaper) on a flat surface to protect your tabletop from the wet paint. Choose the paints you will be using, and clean paint brushes before use.
Step 2: Start painting with your kids! If they are painting the surface of the cans with more than one color leave time for each layer of paint to dry before doing another. Use bright colors so birds are more likely to be drawn to the feeder.
Step 3: Once all of the paint is completely dry use the awl to poke two small holes through the surface of your can. One hole should be on the cylinder side right near the opening, and the other hole should be parallel to the first hole on the cylinder, near the bottom of the can. The two holes should form a straight line perpendicular to the bottom of the can.
Step 4: Cut two long lengths of string. Pull each through one of the holes and double-knot them from the inside. Tie both lengths of string together — this is what you’ll be hanging your bird feeder from, so ensure it’s long enough!
Step 5: Heat up the hot glue gun and glue a popsicle stick to the inside of the can, making sure at least half of the stick is outside of the can so your birds have somewhere to perch and eat.
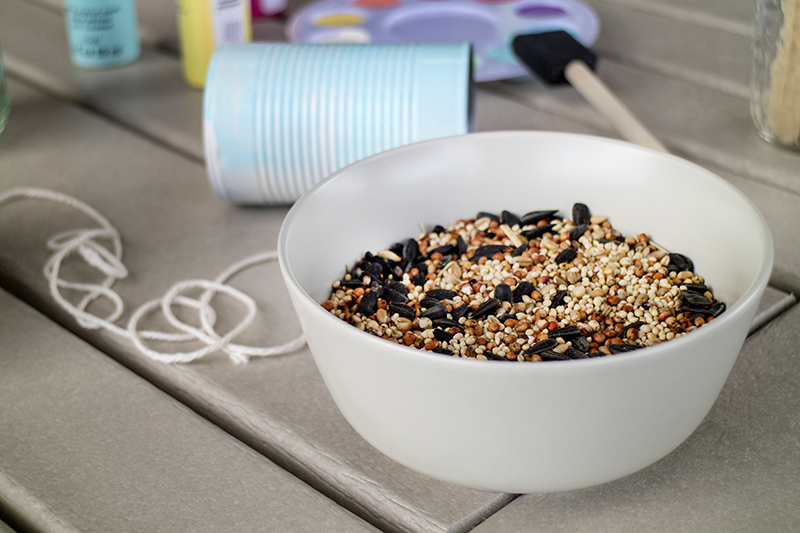
Step 6: Once the glue has dried fill the tin can with some bird seed, keeping in mind it will be hanging on its side.
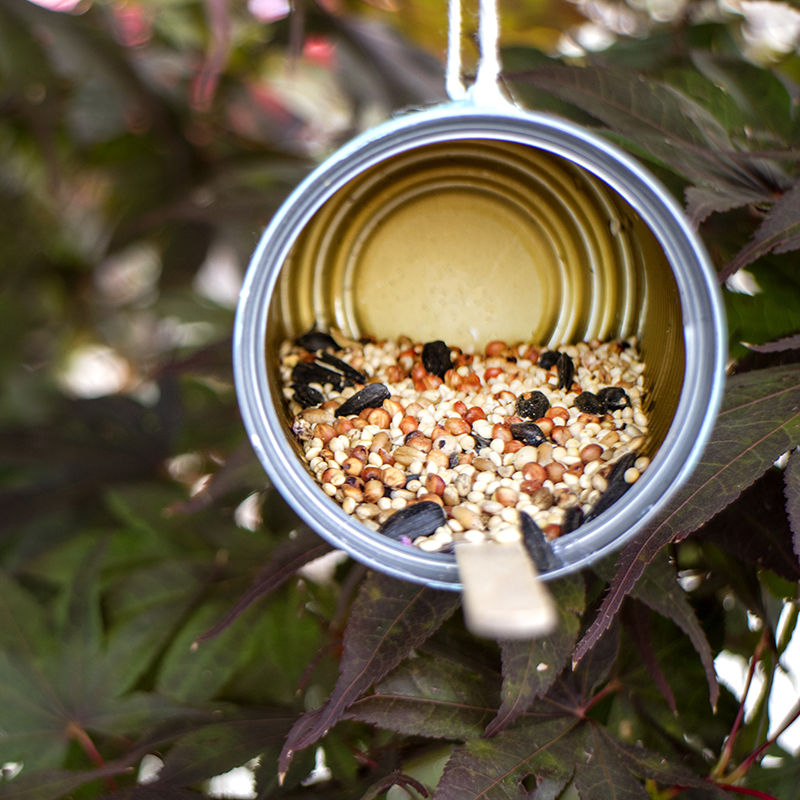
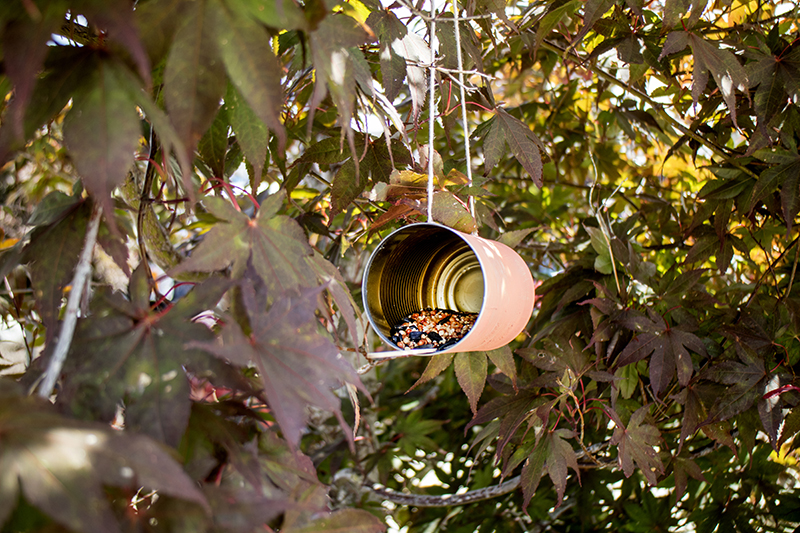
Step 7: Have your kids choose a spot under a tree branch or on your porch and hang your DIY tin can bird feeder! Research local types of birds and see how many you can spot.
Read more about DIY tin can bird feeders at Momtastic.
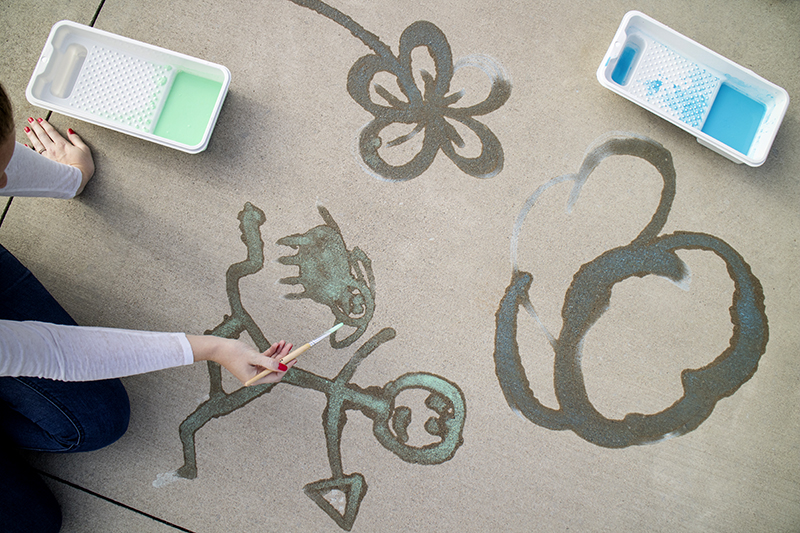
Washable Chalk Paint
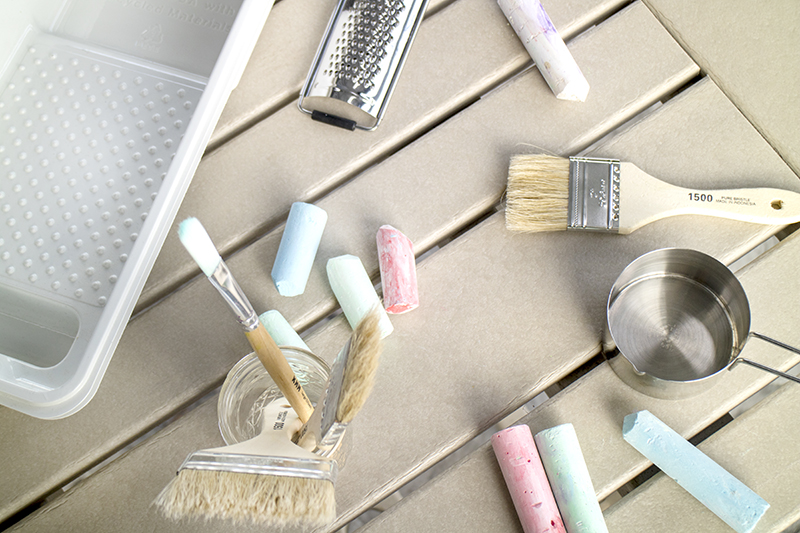
You’ll need:
- Washable chalk
- Large paint trays
- Paint brushes
- Grater (not the one you use for food)
Instructions
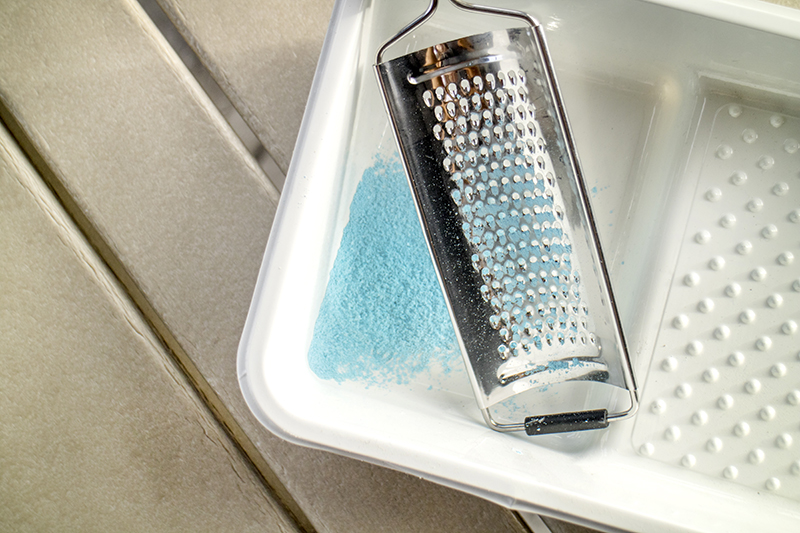
Step 1: Use a grater to grate sticks of washable chalk into your paint tray. Pick up an affordable grater at the dollar store, as you will not want to reuse this for your dinner!
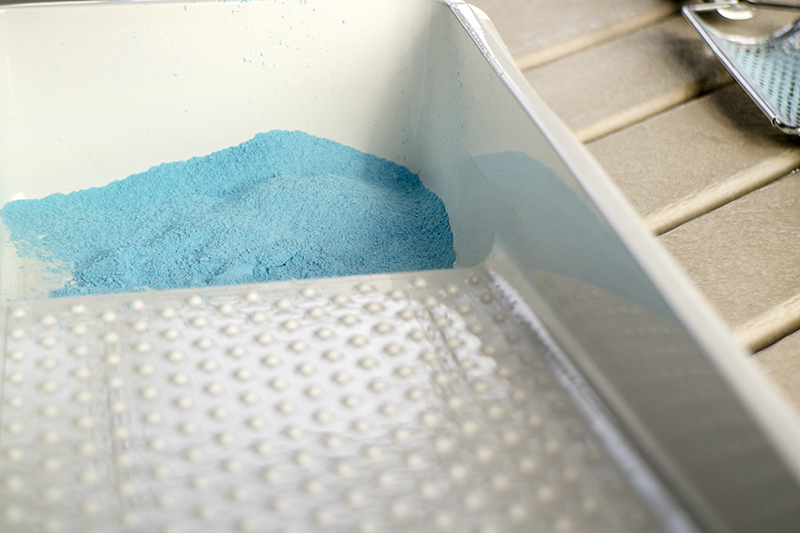
Step 2: Mix one-half cup of water for every stick of chalk you use into the paint tray. This creates a nice consistency of “paint” that your kids can paint the fence or walkway with. The “paint” will easily wash away in the next rain or with a hose, so they can paint a new masterpiece every weekend.
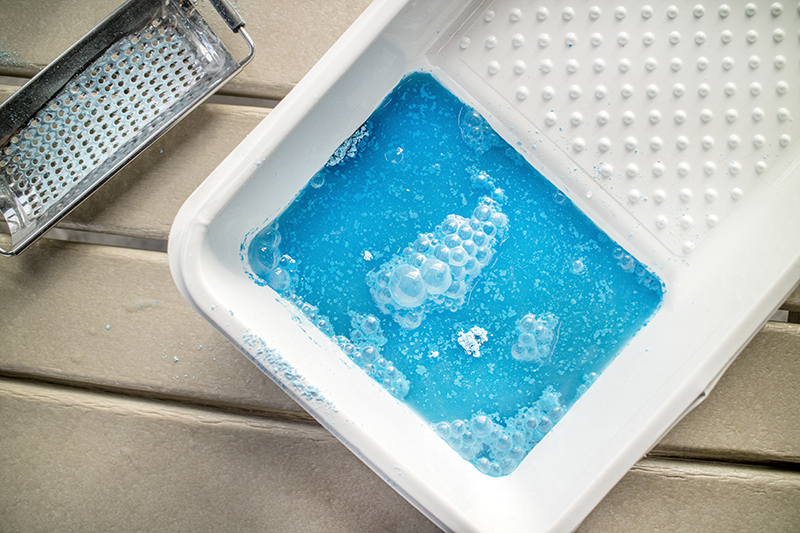
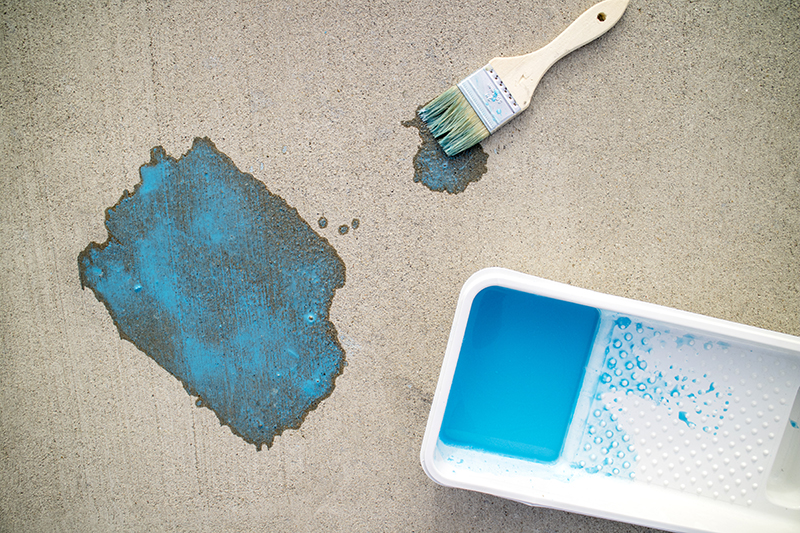
Step 3: Allow your kids to paint to their heart’s’ content! When the paint is first applied it will appear very dark, but as it dries it will take on that signature bright quality of chalk. Use a few different paint trays so your children have multiple colors to choose from.
Find out more about washable chalk paint at Passion For Savings. These kid-friendly projects are just a starting-point for outdoor crafts.
Settle into your favorite outdoor deep seating sofa and make new memories with your kids while adding a touch of personality to your outdoor decor. Check out some other great DIY outdoor project ideas to upgrade your outdoor space and make your Trex® Outdoor Furniture™ on your patio or porch truly feel like home.