Originally Published on June 20, 2018. Last Updated on January 14, 2019.
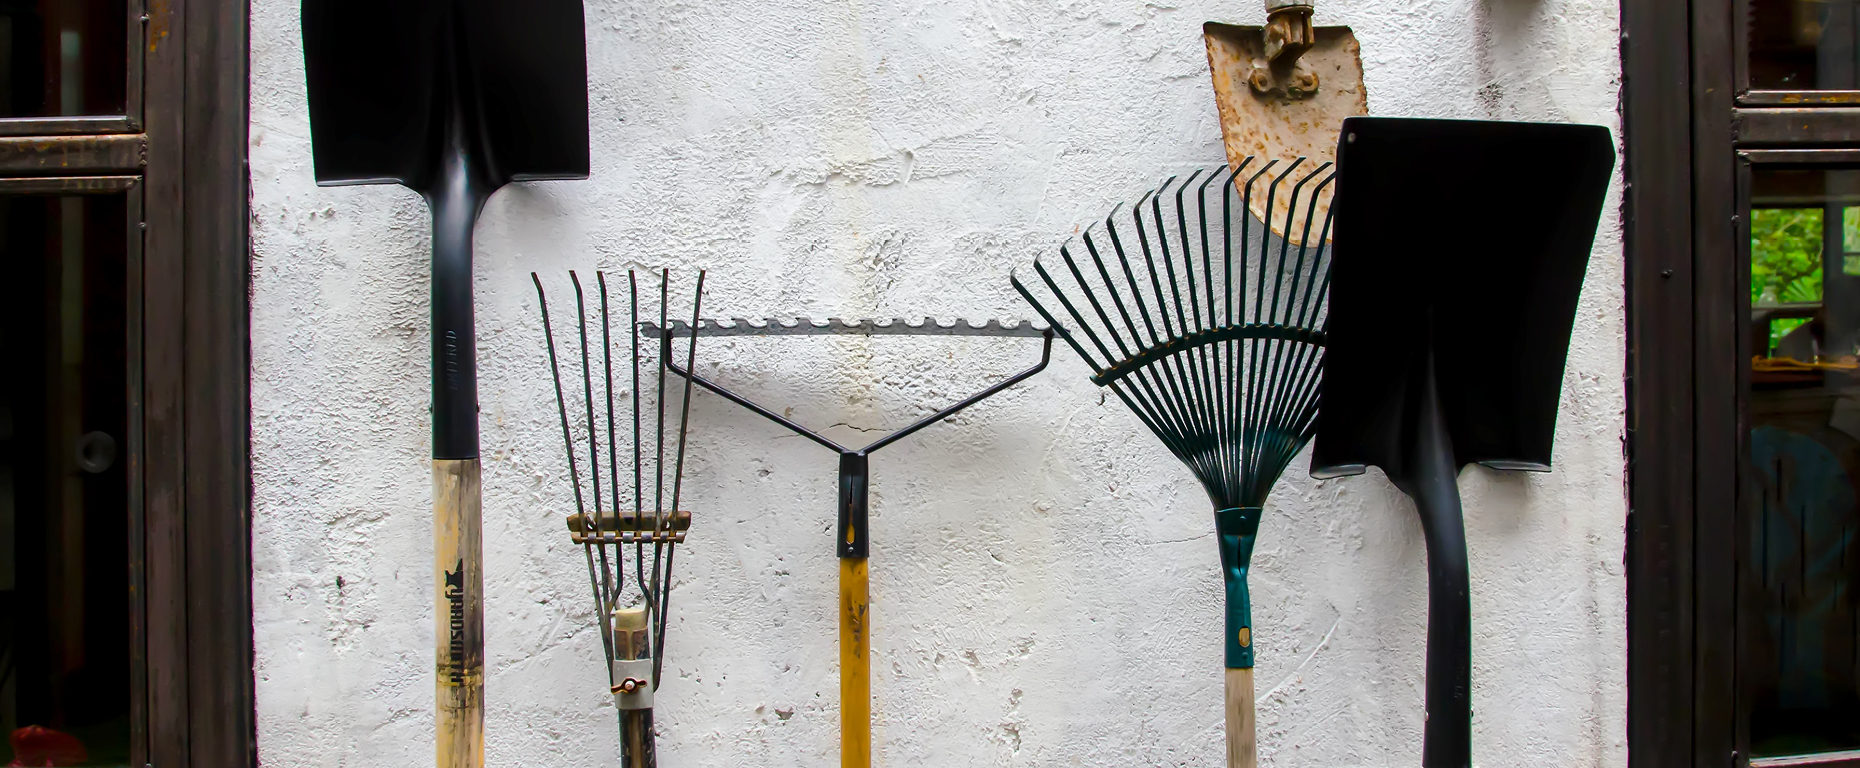
Anyone who enjoys spending time working on their yard or garden knows that having a pair of gloves, a set of pruning shears, or any other basic tool can make accomplishing tasks fast and easy. Using a toolbox is a quick fix, but why not exercise those creative muscles and put together a DIY tools storage space or a DIY tools organizer?
These nifty projects will allow you to keep your tools exactly where you need them… Without sacrificing style.
Mailbox Hideaway Toolbox
Constantly walking back and forth from the house or shed to grab a pruning saw or digging fork can be a real drag. This project allows you to keep small gardening tools close to where you work in an inconspicuous, yet functional space.
We found a great example from the blog Making Manzanita!

You’ll Need:
- Wooden (or metal) mailbox
- Paint
- 3-inch lag screw
- Drill
- 3-foot post
- Shovel
- 10-pound bag of sand or concrete
Instructions:
- Paint your mailbox to match your backyard theme or color scheme. Allow it to dry before moving on.
- Drill a hole in the top center of the post and the bottom center of the mailbox.
- Carefully line up the mailbox on the post and screw it into place.
- Pick the spot you want to place your hideaway toolbox.
- Grab your shovel and dig a hole that’s 7 inches wide and 2 feet deep.
- Pour enough sand to fill the hole up to 6 inches.
- Position the post in the hole before filling the area around it with sand. Be sure to pack it tightly and tamp it down.
- Optional: For a more secure fit, use concrete to place the post.
- Fill the mailbox with garden tools or other implements that will help keep your yard looking fresh all year long!

Check out step by step photos for this project at Making Manzanita.
Rake to Garden Tool Hanger Conversion
Have a rusty, old rake laying around? Don’t throw it out! This fast and easy project lets you turn that underused iron or metal rake into a fully functioning hanger that’s great for storing gardening tools, kitchen utensils, or coats and hats.
Here’s a cute version from BrightNest!
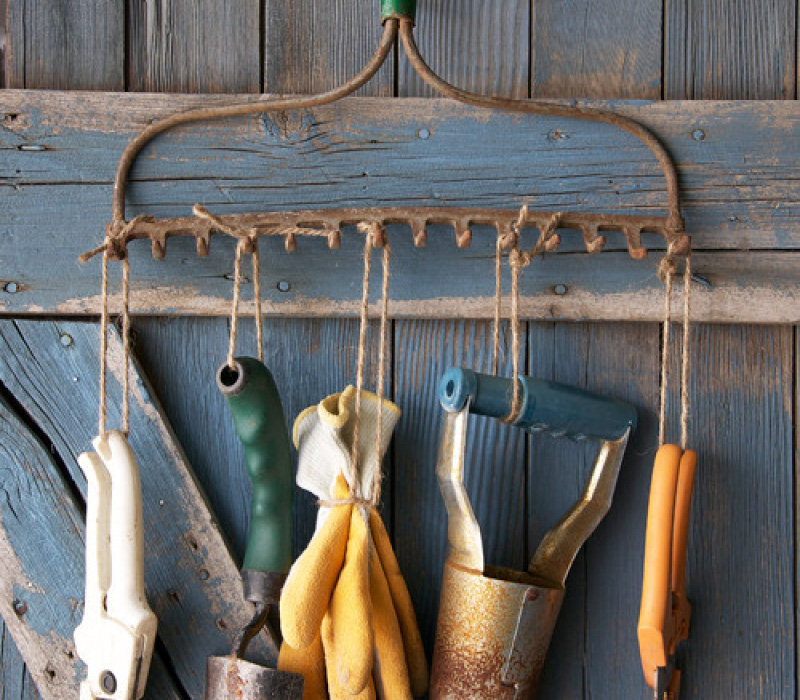
You’ll Need:
- Metal rake
- Spar urethane
- Sharpie
- Jute twine or leather
- ½ x 1¼-inch hose clamps
- Drill screws
- Anchor
- Wire brush
- Saw (optional)
Instructions:
- Start with an older rake you’re not using anymore, or find one at a yard sale or thrift store.
Optional: Depending on the look you’re going for, saw off the handle to the desired length. - Take the wire brush and get rid of any debris or dirt on the rake.
- Use the Spar urethane to seal the end of the metal rake. Don’t worry if some gets on the wood.
- The hose clamp is what holds the rake on the wall. Use the sharpie to mark the area on the hose clamp where you’ll place the screw before drilling it into the wall.
- After attaching the hose clamp to the wall, place the rake inside the clamp and tighten it. Once it’s secure, drill a screw directly under the rake (so the metal rests on the screw) for added support.
- Tie the twine or leather through the loops in each gardening tool. Try only one or two at first to make sure the rake is fully secured.
Find this project and other similar ideas on this Pinterest board.
Wood Pallet Tool Organizer
Having the tools you need can make your job easier, but staying organized harder. So, when you start to run out of storage room, turn to storing your tools on the walls! By taking an old pallet and adding various hooks and tool hangers, you can transform it into a rustic and handy organizer to fit your own specific needs!
Create your own just like Our Little Acre did with the steps below:
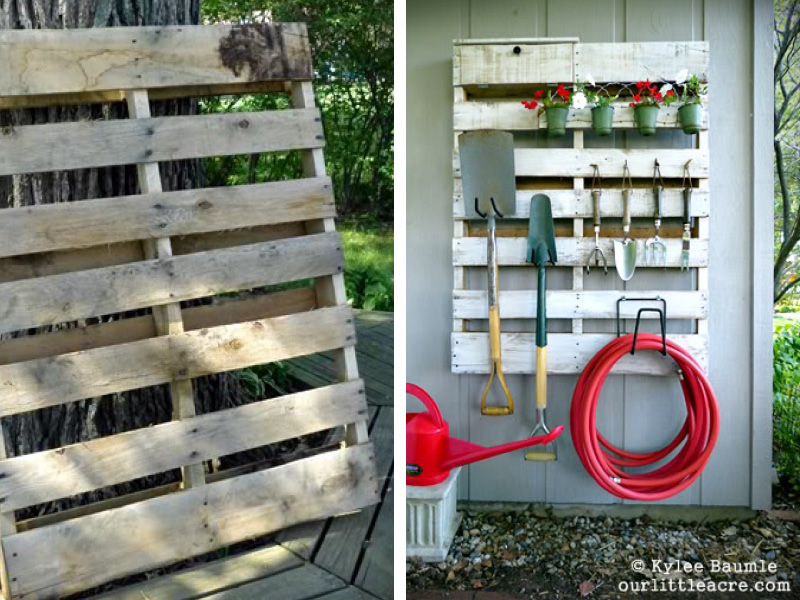
You’ll Need:
- Wooden Pallet
- Desired hooks and tool hangers
- Paint or wood finish
- Drill screws
- Drill
- Sandpaper (Optional)
Instructions:
- Retrieve your pallet and clean and sand down any areas that could cause splinters or be rough to the touch.
- Paint or stain your pallet to match the color scheme you want. Then let it dry.
- Choose where you want to place your hooks and tool hangers and screw them into place. Double check that you give enough space between each hook for each tool or otherwise to be able to hang comfortably and correctly.
- Hang your pallet where it is most useful to you and place your tools, hats and other helpful goodies onto your new organizer!
Check out step by step photos for this project at Our Little Acre.